

How to hang paintings for a luxury interior in 2026
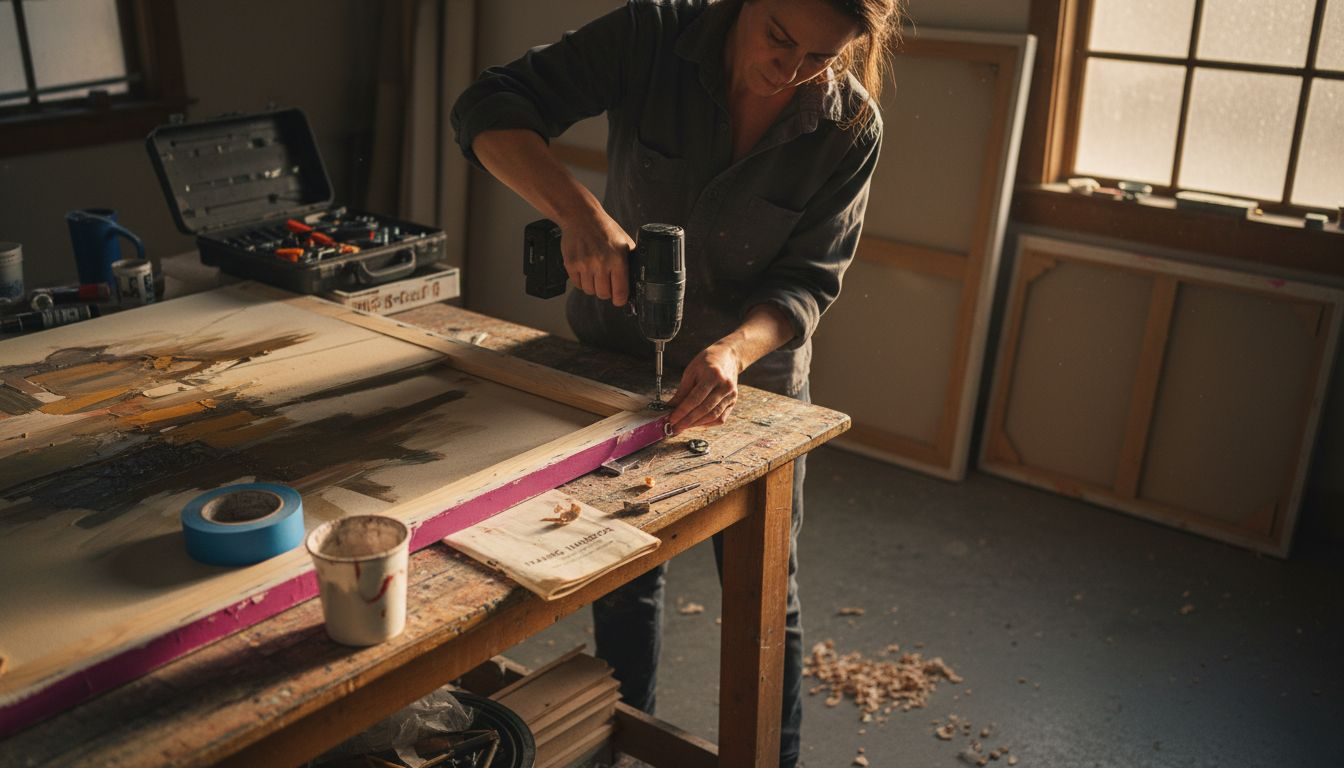
Hanging original contemporary paintings transforms luxury spaces, but improper installation damages valuable art and walls. Many homeowners and designers struggle with choosing hardware, measuring accurately, and securing artwork safely. This guide provides expert techniques to hang paintings with precision, ensuring your investment enhances your interior for years.
Table of Contents
- Prerequisites And Tools Needed
- Choosing Appropriate Hardware For Your Painting
- Measuring And Positioning Paintings With Precision
- Step-By-Step Hanging Process
- Common Mistakes And Troubleshooting
- Safety Considerations In Hanging Artworks
- Alternative Hanging Methods And Their Tradeoffs
- Expected Results And Outcomes
- How Eman’s Gallery Supports Your Art Display Needs
- Frequently Asked Questions
Key takeaways
| Point | Details |
|---|---|
| Hardware selection | Match mounting systems to painting weight and wall type to prevent falls and damage. |
| Precise measurement | Position art center at 57-60 inches eye level using laser tools for millimeter accuracy. |
| Step-by-step process | Following structured installation reduces damage risk and improves visual alignment. |
| Common mistakes | Ignoring stud locations and wrong hardware causes 25% of painting falls in upscale spaces. |
| Alternative methods | Rail systems and adhesive options offer tradeoffs in cost, flexibility, and wall preservation. |
Prerequisites and tools needed
Before hanging original paintings, gather essential tools and materials to ensure safe, precise installation. Proper preparation protects both your artwork and interior surfaces.
You need a stud finder to locate wall support, measuring tape for accurate distances, and a laser level for perfect alignment. A pencil marks drilling points, while protective gloves safeguard hands and delicate painting surfaces. Power drill with appropriate bits completes hardware installation.
Understanding your wall surface matters significantly. Drywall accepts most standard hardware but requires anchors for heavier pieces. Plaster walls need gentler approaches and specialized fasteners. Concrete and brick demand masonry bits and anchors rated for dense materials.
Essential tools include:
- Electronic stud finder for locating wall framing
- Laser level for horizontal and vertical alignment
- Metal measuring tape (25 feet minimum)
- Pencil for marking installation points
- Protective cotton gloves for handling artwork
- Variable-speed power drill with bit set
- Safety glasses for drilling operations
Selecting hardware by painting weight and wall type is critical to safe hanging and prevents costly accidents. Review art print care instructions before beginning your project.
Safety equipment protects you during installation and prevents artwork damage from slips or falls. Never rush preparation, proper setup reduces installation errors dramatically.
Choosing appropriate hardware for your painting
Selecting correct mounting hardware determines whether your painting hangs securely for years or crashes down damaging art and walls. Weight, size, and wall material dictate hardware choices.
Lightweight paintings under 5 pounds work with simple picture hooks or adhesive strips on drywall. Medium pieces between 5 and 20 pounds need sturdy picture hangers or anchored screws. Paintings over 5kg require hardware selected to painting weight and wall type to prevent falls.
D-rings and wire systems distribute weight evenly across mounting points, reducing stress on single fasteners. Install D-rings one-third down from the top edge on both sides of the frame. Wire connects the rings, creating a hanging point that self-levels when suspended.
Drilled anchors and toggle bolts provide maximum security for heavy original paintings on drywall. These expand behind wall surfaces, gripping larger areas than nails alone. Plaster walls accept threaded anchors designed for their unique density and brittleness.
Brick, concrete, and stone surfaces require masonry anchors with appropriate screws. Use carbide-tipped drill bits to create clean holes without cracking decorative surfaces. Match anchor size to screw diameter for proper fit.
| Hardware Type | Weight Capacity | Best For | Wall Damage |
|---|---|---|---|
| Picture hooks | Up to 10 lbs | Lightweight frames, drywall | Minimal nail hole |
| Drywall anchors | 10-50 lbs | Medium paintings, hollow walls | Small drilled hole |
| Toggle bolts | 50-100 lbs | Heavy originals, large frames | Larger hole required |
| Rail systems | Unlimited | Gallery walls, frequent changes | Track installation marks |
| Adhesive strips | Up to 8 lbs | Temporary displays, rentals | No damage if removed properly |
Consider hardware selection for heavy paintings carefully, as undersized fasteners create safety hazards in luxury interiors.
Pro Tip: Purchase hardware rated 50% above your painting’s actual weight for safety margins accounting for vibrations and environmental factors.
Measuring and positioning paintings with precision
Precise positioning elevates artwork from decoration to focal point. Proper height and alignment create professional gallery aesthetics in luxury homes.
Position painting centers at standard eye level between 57 and 60 inches from floor to artwork center. This universal museum standard accommodates most adult viewing heights comfortably. Adjust slightly higher in rooms with tall ceilings or where viewers primarily stand.
Using a laser level improves hanging accuracy to within 1-2 millimeters compared to manual methods. Project horizontal and vertical lines directly on walls, eliminating guesswork and crooked installations. Mark intersection points with pencil for drilling locations.
Measure from ceiling down to center point, then calculate frame hook position by adding half the frame height and subtracting wire slack distance. Most hanging wires pull 2 to 4 inches above frame tops when taut under painting weight.
For multi-piece arrangements, establish baseline alignment first using laser level. Space pieces 2 to 4 inches apart maintaining consistent gaps. Symmetry matters, slight misalignments become obvious in luxury settings with clean sight lines.
Precise measurement steps:
- Mark 57-60 inches up from floor for center point
- Project laser level lines for horizontal alignment
- Calculate hook position accounting for wire slack
- Mark drill points with sharp pencil
- Verify measurements twice before drilling
- Check alignment from multiple viewing angles
Ergonomic factors prevent viewer neck strain and eye fatigue. Avoid placing large paintings above 72 inches to maintain comfortable sight lines. Lower positioning works better in sitting areas where viewers relax in chairs.
Review precise measuring and positioning techniques for gallery-quality results matching professional interior design standards.
Step-by-step hanging process
Following structured installation procedures minimizes damage risks and ensures secure mounting. Each step builds on previous preparation work.
Following a consistent step-by-step hanging process reduces damage and improves final appearance significantly.
-
Locate wall studs using electronic stud finder, marking positions with pencil. Studs provide maximum support for heavy paintings without anchors.
-
Transfer measurements from planning phase onto wall surface using laser level and measuring tape. Double-check all marks before drilling.
-
Drill pilot holes at marked locations using appropriate bit size for chosen hardware. Start slowly preventing wall surface chipping or cracking.
-
Install mounting hardware firmly, ensuring screws or anchors sit flush with wall surface. Test security by pulling gently on installed hardware.
-
Put on protective cotton gloves before handling painting to prevent fingerprints on frames and canvas edges. Original artwork deserves careful treatment.
-
Lift painting carefully, positioning wire or hanging mechanism over installed hardware. Heavy pieces require two people for safe handling.
-
Lower painting gently onto hooks or screws, ensuring wire seats properly in hardware grooves. Listen for secure clicking or settling sounds.
-
Perform final alignment check using laser level, adjusting painting position slightly if needed. Step back 8 to 10 feet evaluating visual balance.
-
Verify painting sits level horizontally and vertically using both laser and physical level tools. Make micro-adjustments by lifting corners gently.
-
Test security by applying gentle upward pressure on frame bottom. Properly installed paintings resist movement without hardware sounds.
Pro Tip: Place small felt pads on frame back bottom corners preventing wall scuffs and maintaining level position over time as buildings settle.
Examine step-by-step hanging instructions for detailed guidance on mounting techniques suited to luxury contemporary art collections.
Common mistakes and troubleshooting
Avoiding frequent installation errors saves time, money, and prevents damage to valuable original paintings. Recognize problems early and implement fixes quickly.
Ignoring painting weight or improper hardware causes 25% of painting falls in upscale interiors, creating expensive damage to artwork and surfaces.
Matching hardware weight capacity to actual painting mass prevents failures. Many installers underestimate frame weight, choosing inadequate hooks or anchors. Weigh paintings on bathroom scales before selecting mounting systems.
Failing to locate wall studs leads to relying solely on drywall anchors for heavy pieces. While quality anchors work well, stud mounting provides superior long-term security. Use stud finders properly, scanning slowly and marking all framing locations.
Positioning paintings too high or too low ruins aesthetic impact and viewing comfort. Measure carefully from floor to center point, not from ceiling down. Rooms with unusual ceiling heights need adjusted positioning maintaining 57 to 60 inch eye level standard.
Skipping measuring tools and eyeballing placement guarantees crooked installations. Even experienced installers use levels and measuring devices for precision. Laser levels eliminate human error in alignment judgments.
Common installation problems:
- Hardware weight rating below painting mass
- Missing wall studs during planning
- Incorrect eye level height calculations
- Forgetting to account for wire slack
- Rushing measurements causing misalignment
- Using damaged or worn hanging wire
- Drilling without pilot holes cracking walls
Troubleshooting fixes include rechecking all measurements against original plan, upgrading to heavier-duty hardware, and relocating mounts to stud positions. Remove inadequate fasteners completely before installing proper hardware.
Pro Tip: Keep spare picture wire, D-rings, and various anchors in your toolkit for immediate fixes without project delays or additional shopping trips.
Study avoiding common painting hanging errors to maintain professional installation standards protecting your art investment.
Safety considerations in hanging artworks
Protecting yourself and valuable paintings during installation requires following safety protocols and using appropriate protective equipment. Accidents damage art and cause injuries.
Using protective gear and proper tools prevents injury and artwork damage during installation operations.
Wear cotton gloves when handling original paintings preventing skin oils, fingerprints, and accidental scratches on frames or canvas edges. Gloves improve grip on smooth frame surfaces reducing drop risks.
Employ stud finders and wall scanners before drilling anywhere. Hidden electrical wiring and plumbing pipes create serious hazards if punctured. Scan thoroughly in all directions from intended drilling locations.
Ladder safety prevents falls causing personal injury and artwork damage. Use stable stepladders with locking mechanisms, never chairs or makeshift platforms. Position ladders on level floors away from door swing paths. Have assistants steady ladders when working above shoulder height.
Power tool practices protect fingers and eyes from injury. Wear safety glasses when drilling preventing dust and debris from entering eyes. Keep drill bits sharp replacing worn ones that bind or grab unexpectedly.
Never rush installation despite time pressures. Hurrying causes measurement errors, dropped paintings, and hardware failures. Allocate sufficient time completing each step carefully and methodically.
Safety protocols include:
- Cotton gloves for handling all original artwork
- Safety glasses during drilling operations
- Stable ladders with locking mechanisms
- Wall scanners checking for hidden utilities
- Assistant help for paintings over 30 pounds
- Sharp drill bits preventing binding accidents
- Clean work area free of tripping hazards
“Proper safety practices protect both installer and irreplaceable original artwork, making careful procedures worth the extra time investment.”
Handle paintings gently during all installation phases. Avoid touching canvas surfaces directly even with gloves. Lift frames from sides or bottom edges distributing weight evenly.
Consult safety gear and handling tips for comprehensive protective measures during art installation projects.
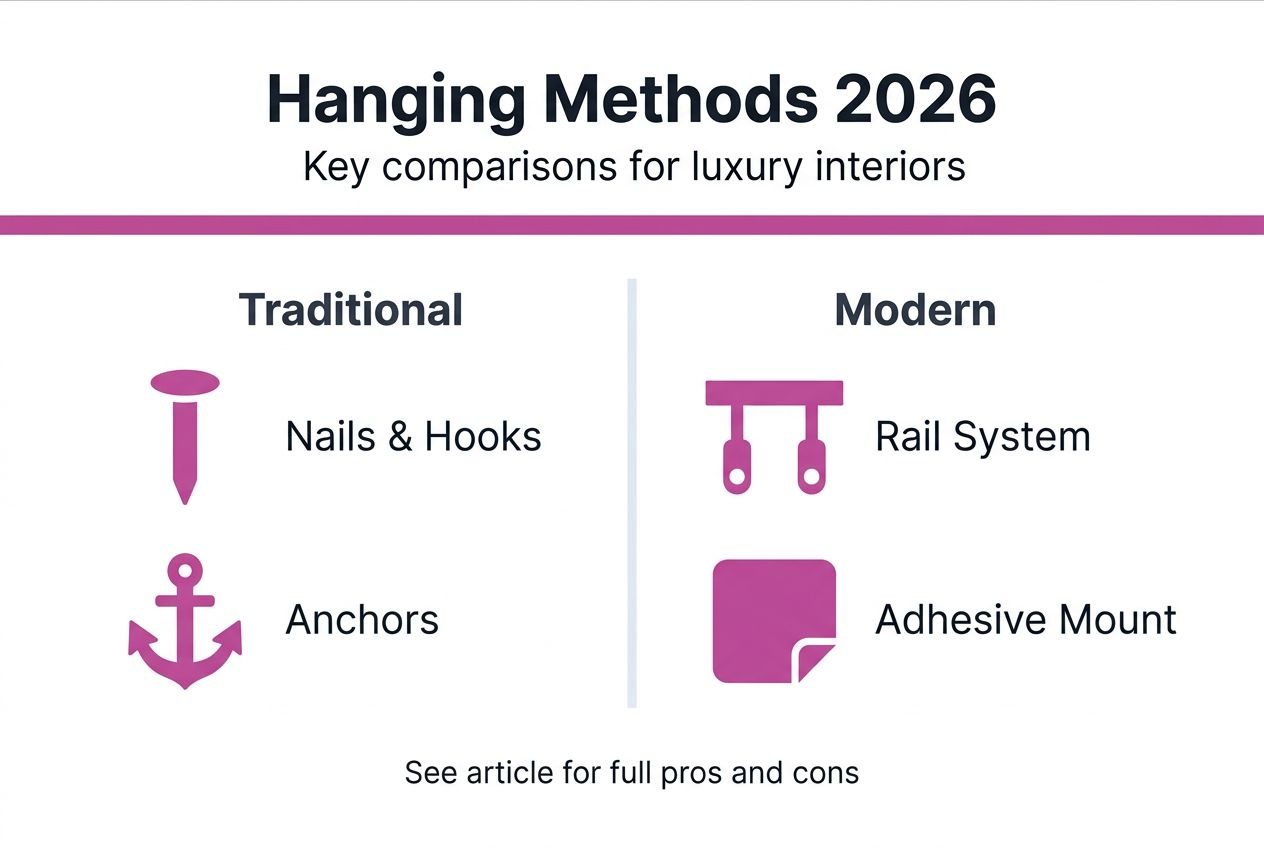
Alternative hanging methods and their tradeoffs
Traditional hardware works well but alternative mounting systems offer benefits for specific situations and priorities. Evaluate options matching your needs.
Rail and cable systems mount horizontal tracks near ceiling level, suspending paintings from adjustable cables with hooks. These systems allow easy height adjustments and artwork rotation without drilling new holes. Museums and galleries favor rails for flexible displays.
Rail systems reduce wall damage to single track installation. Reposition artwork freely by sliding cables along tracks. However, rails cost significantly more than traditional hardware, often $200 to $500 for room installations. Visible tracks may not suit all luxury interior aesthetics.
Adhesive strips and hooks protect wall surfaces completely, removing cleanly without holes or marks. Products rated for picture hanging support lightweight artwork up to 8 pounds safely. Perfect for rental properties or temporary displays.
Adhesive methods suit lightweight prints but risk expensive original paintings. Weight limits restrict use to small pieces. Temperature and humidity affect adhesive strength over time. Most luxury homeowners prefer permanent mounting for valuable collections.
Traditional nails and hooks offer simplicity and low cost. Simple installations take minutes with minimal tools. However, nails leave visible holes requiring repair if artwork moves. Weight capacity limits restrict use to lighter pieces under 15 pounds.
| Method | Wall Damage | Weight Capacity | Cost | Flexibility | Best Use Case |
|---|---|---|---|---|---|
| Rail systems | Minimal (track only) | Unlimited | High ($200-500) | Excellent | Gallery walls, frequent changes |
| Adhesive strips | None | Up to 8 lbs | Low ($10-30) | Limited reuse | Rentals, temporary displays |
| Picture hooks | Small nail hole | Up to 15 lbs | Very low ($5-15) | Low | Lightweight pieces |
| Drilled anchors | Medium hole | 50+ lbs | Low ($15-40) | None | Permanent heavy installations |
| French cleats | Two horizontal cuts | Unlimited | Medium ($30-80) | Good | Large contemporary pieces |
Select mounting methods balancing wall preservation priorities against painting weight requirements and budget constraints. Consider how often you plan rotating artwork displays.
Explore alternative hanging methods for creative solutions matching your luxury interior design preferences and collection management needs.
Expected results and outcomes
Following professional hanging procedures delivers specific benefits improving both immediate installation success and long-term artwork display quality. Set realistic expectations for time and results.
Average installation time for medium paintings is 30-45 minutes including all measurement, drilling, and alignment steps. Larger pieces or complex gallery walls require additional time. First-time installers should allocate extra time for careful work.
Properly selected hardware ensures secure mounting lasting 5 years or longer without maintenance. Quality anchors and screws resist vibration, settling, and environmental changes. Regular visual inspections every 6 months confirm continued security.
Positioning artwork at correct eye level enhances luxury interior ambiance significantly. Visitors naturally focus on properly hung paintings, creating intended focal points. Professional placement elevates perceived room value and sophistication.
Correct installation methods prevent visible wall damage beyond small filled holes when relocating artwork. Quality hardware removes cleanly or hides behind replacement pieces. Careful drilling avoids wall surface cracking or chipping.
Following this guide improves installation confidence for future projects. Understanding hardware selection, measurement techniques, and safety protocols transfers to hanging mirrors, shelves, and other wall decor. Skills compound with practice.
Expected outcomes include:
- Secure mounting lasting 5+ years
- Professional-quality visual alignment
- Minimal wall damage requiring repair
- Improved confidence for future installations
- Enhanced room aesthetics and value
- Safe artwork handling preventing damage
Review expected durability and aesthetic impact for long-term artwork display quality standards in luxury contemporary interiors.
How Eman’s Gallery supports your art display needs
Your newly mastered hanging techniques deserve artwork that matches your skill and attention to detail. Eman’s Gallery offers curated original contemporary paintings perfect for luxury interiors where precise installation matters.

Explore exclusive original works like Good Tidings and Nocturned created by artist Eman Khalifa. Each piece represents one-of-a-kind artistry worthy of professional hanging methods protecting your investment.
Benefit from expert guidance on artwork care and display techniques. Our team understands luxury interior requirements and helps select pieces complementing your design vision. Shop securely online accessing diverse contemporary styles from abstract to landscape paintings.
Enhance your space with museum-quality artwork that rewards precise installation effort. Visit Eman’s Gallery to discover original paintings transforming your luxury interior into a personal gallery showcasing exceptional contemporary art.
Frequently asked questions
How much weight can standard picture hooks support?
Standard picture hooks typically support 5 to 10 pounds depending on design and wall surface. Heavier original paintings require wall anchors, toggle bolts, or mounting directly into wall studs for secure long-term hanging. Always check manufacturer weight ratings before selecting hardware.
Can I hang an original painting on plaster walls without damaging them?
Yes, use picture hooks or adhesive strips specifically rated for plaster surfaces and lighter paintings. Heavier original pieces need threaded anchors designed for plaster’s unique density. Drill pilot holes slowly to prevent cracking.
What tools ensure the most accurate painting alignment?
A laser level combined with metal measuring tape and pencil marks provides millimeter-scale accuracy. Digital levels offer angle readings for precise horizontal alignment. These tools eliminate guesswork producing professional gallery-quality results.
Are adhesive strips a good option for original contemporary art?
Adhesive strips suit only lightweight pieces under 8 pounds and carry risks for valuable original paintings. Secure drilled hardware provides better protection for investment-grade artwork ensuring long-term safety and stability in luxury interiors.
Recommended
- 6 Best Framed Art Ideas for Luxury Interiors
- Curating Home Gallery Guide for Luxury Interiors
- Art Showcasing Techniques for Luxurious Interiors - Eman’s Gallery
- 7 Expert Wall Art Color Tips for Luxury Interiors
Stay Connected
- ✨ Explore Eman Khalifa’s original art and fine art prints
- 📸 Follow Eman Khalifa’s art journey on: Instagram @emans_gallery and Facebook Eman’s Gallery
- 📹 Watch Eman Khalifa creating live art on: YouTube @emans_gallery