


How to Display Canvas Art: Practical Placement Guide
TL;DR:
- Hanging canvas art at eye level between 57 and 60 inches creates visual harmony in a room. Using appropriate hardware and considering room lighting ensures the artwork remains impactful and well-preserved. Creative display methods like leaning or layering enhance flexibility and aesthetic appeal without relying solely on traditional wall mounting.
You hang the canvas. Step back. Something feels off. The painting is too high, or the wall looks cluttered, or the lighting washes out every detail. Knowing how to display canvas art well is the difference between a room that feels considered and one that feels like an afterthought. This guide covers the tools you need, the exact measurements that work, creative alternatives to traditional hanging, and how to preserve what you display. Whether you are working with a single statement piece or arranging canvas paintings across an entire wall, every answer you need is here.
Table of Contents
- Key takeaways
- How to display canvas art: tools and materials
- Hanging canvas art step by step
- Creative alternatives to traditional hanging
- Lighting and positioning for visual impact
- Maintaining and refreshing your display
- My perspective on displaying canvas art
- Original canvas art worth displaying
- FAQ
Key takeaways
| Point | Details |
|---|---|
| Center at 57 to 60 inches | Hang canvas art so its center sits at eye level, roughly 57 to 60 inches from the floor. |
| Use the right hardware | Match your hanging hardware to wall type and canvas weight to keep art secure and walls undamaged. |
| Spacing above furniture matters | Leave 6 to 12 inches between the top of furniture and the bottom of the canvas for visual balance. |
| Lighting affects everything | Avoid direct sunlight and use adjustable accent lights to bring out color without causing fading. |
| Flexible display extends creativity | Leaning, ledge-stacking, and picture rails allow easy rearrangement without committing to nail holes. |
How to display canvas art: tools and materials
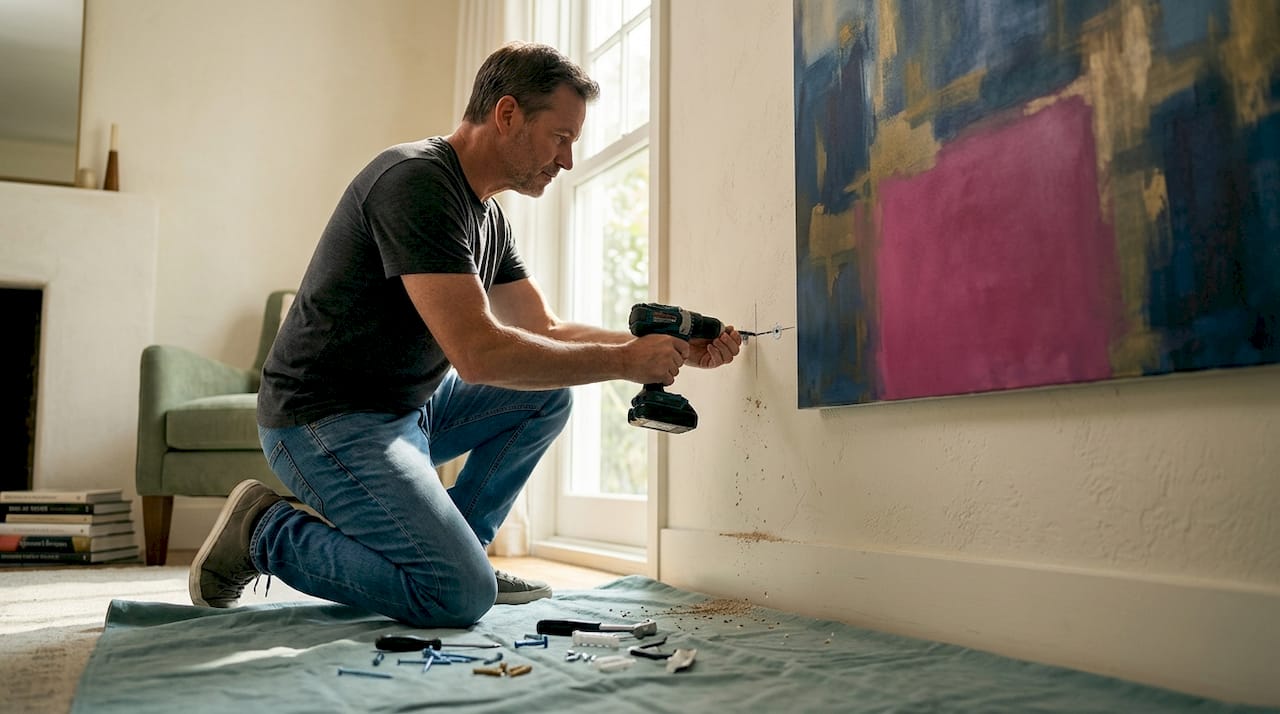
Before anything goes on the wall, you need the right supplies. Using the wrong hardware is the most common reason canvas art ends up crooked, damaged, or pulled from the wall entirely. A basic hanging toolkit includes a hammer, nails or screws, a spirit level, a measuring tape, and a pencil for marking.
Beyond those basics, your hardware choice depends on what is already attached to the back of the canvas and what type of wall you are working with.
Common hanging hardware options:
- D-ring hangers: Two metal rings mounted near the top of the canvas frame. They distribute weight across two points, which makes them a strong choice for medium to large pieces.
- Sawtooth hangers: A single serrated metal strip centered on the top frame. These work well for smaller, lighter canvases and allow fine horizontal adjustment.
- Wire hangers: Strung between two D-rings or eye hooks. They give you the most flexibility for leveling after the canvas is hung.
- Keyhole brackets: Recessed slots that lock onto screws in the wall. These give a flush, almost frameless look.
For renters or anyone who wants a no-drill solution, Command strips rated for the weight of the canvas are a practical option. Check the manufacturer’s weight limit carefully. Most standard Command picture strips hold up to 4 pounds per pair. For a heavier canvas, you will either need multiple sets or a different approach entirely.
Wall type matters more than most people realize. Drywall accepts nails and screws easily, but you need a stud or a wall anchor for anything heavy. Plaster walls require a masonry bit and appropriate anchors. Brick and concrete need masonry screws or specialized adhesive hooks.
Pro Tip: Before driving any nail into drywall, use a stud finder to locate framing. Anchoring into a stud means you can hang a much heavier canvas without risk.
| Hardware type | Best for | Weight range |
|---|---|---|
| Sawtooth hanger | Small to medium canvases | Up to 20 lbs |
| D-ring with wire | Medium to large canvases | Up to 50 lbs |
| Heavy-duty wall anchor | Large canvases, no stud available | Up to 75 lbs |
| Command strips | Renters, lightweight pieces | Up to 16 lbs total |
Hanging canvas art step by step
This is where most people rush and regret it. Taking ten extra minutes with a measuring tape saves you from a wall full of exploratory nail holes.
-
Decide on your center height. The standard for eye-level placement is 57 to 60 inches from the floor to the center of the canvas. In a room where people primarily sit, like a home theater or dining room, you can drop closer to 55 inches. In a standing-only space like a hallway, the standard range works perfectly.
-
Mark your center point. Use a pencil to lightly mark the wall at your chosen center height. This is the reference point everything else is calculated from.
-
Measure the canvas. Note the total height, then measure from the top of the canvas down to the hanger or the taut point of the wire. Subtract that distance from your center height mark. The result is where your nail goes.
-
Use the toothpaste trick for accuracy. Apply a small dab of toothpaste directly onto the sawtooth hanger or the center point of a wire. Press the canvas firmly against the wall at the correct position, then pull it away. The toothpaste leaves an precise nail mark exactly where you need it. No guessing required.
-
Drive the nail or hook. Keep the nail at a slight upward angle (around 45 degrees) so the canvas sits flush against the wall without tilting forward.
-
Check with a spirit level. Hang the canvas, then hold a small level along the top edge. Adjust before the canvas settles. For wire hangers, slide the wire left or right until the bubble centers.
-
Check spacing above furniture. If the canvas hangs over a sofa, console, or bed, 6 to 12 inches between the top of the furniture and the bottom of the canvas keeps proportions balanced. Less than 6 inches looks cramped. More than 12 inches disconnects the art from the furniture arrangement below it.
“When hanging multiple canvases as a group, treat the entire arrangement as one composition. Find a single eye-level center point for the whole grouping, then build outward with consistent 4 to 6 inch gaps between each piece.”
For large or very heavy canvases, do not rely on a single hook. Multiple mounting points distribute the load and prevent the canvas from warping or pulling away from the wall over time. Two D-rings connected by a wire, anchored into two wall studs, is the most secure configuration for pieces over 24 inches wide.
Pro Tip: Cut a paper template the exact size of your canvas and tape it to the wall before committing to any holes. This lets you test placement, spacing, and scale in seconds.
Creative alternatives to traditional hanging
Not every canvas needs a nail. Some of the most striking displays happen at floor level or on a shelf. Flexible display methods like leaning and layering let you change your arrangement on a whim without repainting or patching walls.
Here are the most effective alternatives worth knowing:
- Floor leaning: A large canvas leaned against a wall, either directly on the floor or propped on a low shelf, creates a relaxed, gallery-like effect. This works especially well for oversized pieces above 30 inches where hanging would feel too static.
- Mantel layering: Stack a canvas behind decorative objects on a fireplace mantel. The art becomes part of a composed vignette rather than a standalone display. Try layering two canvases of different sizes for depth.
- Picture rails and ledges: Wall-mounted ledges let you swap canvas paintings without touching a nail. They also allow you to mix canvas art with framed prints, ceramics, or books for a collected, evolving display. Check out Emansgallery’s guide to gallery wall layouts for specific arrangement ideas.
- Unexpected rooms: Kitchens, bathrooms, and entryways are underused spaces for canvas art. A single seascape canvas in a bathroom or a geometric abstract in a hallway niche creates focus in rooms that rarely get the treatment.
- Mixed-media groupings: Combine canvas paintings with differently framed prints, mirrors, or wall sculptures. The variation in surface and depth stops a display from feeling flat or repetitive.
Pro Tip: When leaning canvases on a shelf or floor, place the heaviest and largest piece at the back and layer smaller works in front. It stabilizes the arrangement and creates natural visual depth.
For ideas tailored to compact spaces, Emansgallery’s article on small space art display covers configurations that work even in tight rooms.
Lighting and positioning for visual impact
Lighting is where most canvas art displays either succeed or fall apart. Get it right and the colors read exactly as intended. Get it wrong and you lose half the painting to glare or shadow.
Direct sunlight fades canvas art over time. UV rays break down pigments, and the damage is cumulative and irreversible. Position canvas paintings away from south-facing windows or use UV-filtering glass or film on those windows.
Lighting options that work:
- Adjustable picture lights: These mount directly above the canvas and direct a focused beam across the surface. They are the most controlled option for highlighting detail.
- Track lighting: A track system with adjustable heads lets you redirect light as you rearrange art. It works well in rooms with multiple pieces.
- Wall sconces: Flanking a canvas with two soft sconces adds warmth and frames the art architecturally.
- Floor or table uplighting: For canvases leaning against a wall, a small uplight placed in front throws dramatic contrast and works particularly well for abstract or textural works.
Wall color matters as much as lighting. A canvas with warm tones will recede against a warm-colored wall. Neutral gray, warm white, or dark navy tend to give canvas art the most contrast and definition regardless of the painting’s palette.
Positioning relative to furniture also shapes how art reads in a room. Canvases hung in isolation on a large wall tend to look small regardless of actual size. Anchoring the display to a sofa, bed, or console below it grounds the art and makes the same canvas look more intentional.
Maintaining and refreshing your display
Once your canvas is up, a little ongoing attention keeps it looking its best.
Clean canvas with a soft dry cloth only. No water, no chemical cleaners. Wipe lightly to remove surface dust, and avoid pressing hard enough to alter the texture of the paint.
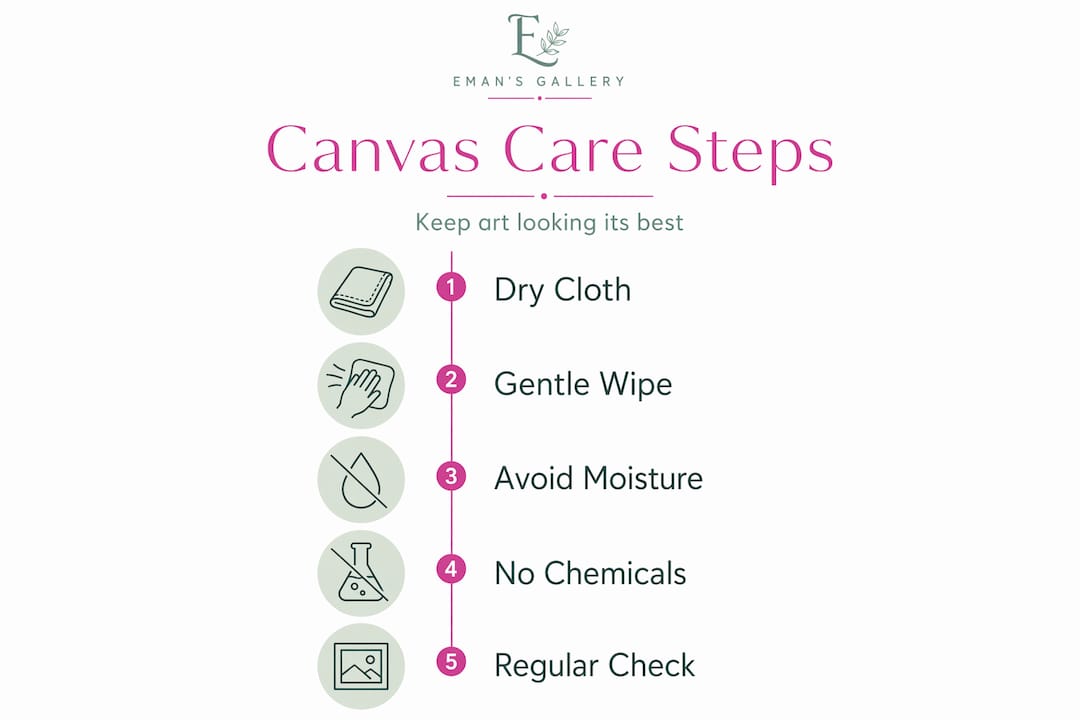
Humidity and heat are the two main enemies of canvas over time. Keep paintings away from exterior walls that experience condensation, and away from heating vents or radiators. Consistent indoor humidity in the 40 to 50 percent range is ideal.
Rotating artwork periodically refreshes any room without buying anything new. Even moving a canvas from one wall to another or switching two pieces between rooms creates a noticeably different effect.
Common display mistakes to fix:
- Hanging art too high (the most common error, corrected by the 57 to 60 inch center rule)
- Overcrowding a wall with too many pieces at inconsistent spacing
- Using hardware that is underrated for the canvas weight
- Placing art where it catches direct afternoon sunlight
Pro Tip: Take a photo of your current arrangement every few months. When it stops looking fresh in the photo, that is your cue to rotate or rearrange.
My perspective on displaying canvas art
I have seen people spend hours agonizing over whether a canvas is centered by a quarter inch. That energy is often better spent asking whether the piece belongs in that room at all.
In my experience, the displays that work best are the ones built around a specific piece rather than a general rule. The 57-inch center height is a starting point, not a law. I have hung large canvases lower when the furniture arrangement demanded it, and the result looked far better than strict adherence to the standard would have allowed.
The shift I recommend most often is moving away from permanent hanging as the default. Leaning and ledge-based displays are not a compromise. They are often a better design choice. They invite change, they do not punish experimentation, and they allow a collection to evolve as your taste does.
What I have found consistently is that a single well-placed, well-lit canvas outperforms a crowded gallery wall of mediocre pieces. Restraint is underrated. Before adding another canvas, ask whether the ones already displayed are actually being seen.
— Eman
Original canvas art worth displaying

Once your walls are ready, the art itself is what makes the difference. Emansgallery offers original handmade paintings and museum-quality canvas prints by artist Eman Khalifa, spanning abstract, seascape, geometric, and landscape styles. Each piece ships worldwide and is designed to function as a room’s focal point.
For bold wall statements, the Mystic Sea original painting brings fluid gold and ocean tones to any space. The Nocturned original delivers a tonal moonlit atmosphere suited for understated, sophisticated rooms. Browse the full range of canvas and framed prints to find a piece scaled and styled for your specific space.
FAQ
What height should canvas art be hung at?
Center your canvas at 57 to 60 inches from the floor. Adjust slightly lower if the primary viewing position is seated.
How far above a sofa should a canvas hang?
Leave 6 to 12 inches between the top of the sofa and the bottom edge of the canvas. This keeps the art visually connected to the furniture without feeling crowded.
Can I hang canvas art without nails?
Yes. Command strips rated for your canvas weight work for lighter pieces. Picture rails and ledge shelves are better options for heavier canvases or renters who cannot make wall modifications.
How do I space multiple canvases on a wall?
Maintain 4 to 6 inches between each piece in a gallery grouping. Treat the entire arrangement as one composition, centering the group at eye level rather than centering each canvas individually.
How do I prevent canvas art from fading?
Keep canvas away from direct sunlight and use UV-filtering window treatments in rooms with strong natural light. Adjustable artificial lighting is the most reliable way to illuminate art without long-term color damage.
Stay Connected
-
✨ Explore Eman Khalifa's original art, fine art prints & art merchandise
-
Follow Eman Khalifa's art journey on: Instagram @emans_gallery and Facebook Eman's Gallery
-
Watch Eman Khalifa creating live art on: YouTube @emans_gallery
-
Supported by BabyLoveGrowth
