


How to Make a Photo Wall: Simple DIY Steps for Any Room
Make a photo wall by choosing one anchor piece, measuring your space to set a composition width, and hanging everything with consistent 5 to 8 centimeter (about 2 to 3 inch) gaps between frames. Three moves get you there: pick your anchor, measure and template the layout, then hang from the center out. Keep these numbers in mind as you work:
- Spacing: 5–8 cm between frames for a cohesive look
- Center height: composition midpoint around standard eye level
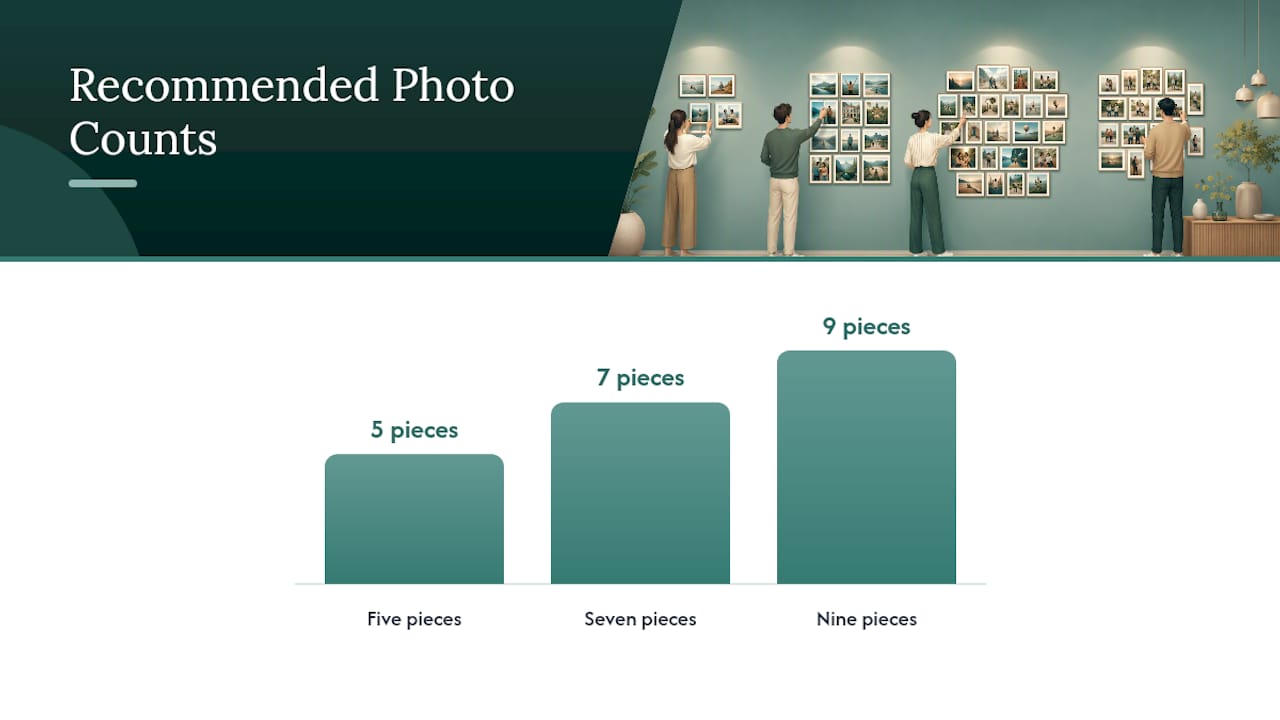
- Grouping: odd numbers (5, 7, 9 pieces) read more natural than even ones
Key Takeaways
A balanced photo wall depends on choosing an anchor piece first, measuring the space accurately, and keeping spacing consistent at 5 to 8 centimeters throughout.
| Point | Details |
|---|---|
| Start with an anchor | Choose your largest or most striking piece first and build the layout around it. |
| Measure before drilling | Set composition width at roughly two thirds of the furniture below it. |
| Keep spacing consistent | Maintain 5 to 8 centimeters between frames for a cohesive, unified look. |
| Favor odd numbers | Groups of 5, 7, or 9 pieces tend to balance more naturally than even counts. |
| Consider a ready-made anchor | An original painting or canvas print from Emansgallery can simplify the whole layout. |
Table of Contents
- Materials and Tools You Need Before You Start
- How Do You Measure and Plan a Photo Wall Layout?
- Which Layout Style Fits Your Space Best?
- How Do You Hang a Photo Wall Step by Step?
- Styling Tips That Make a Photo Wall Look Curated
- Quick DIY Photo Wall Projects to Try
- Common Photo Wall Mistakes and How to Fix Them
- Give Your Photo Wall a Head Start With an Anchor Piece
- Sources
- FAQ
Materials and Tools You Need Before You Start
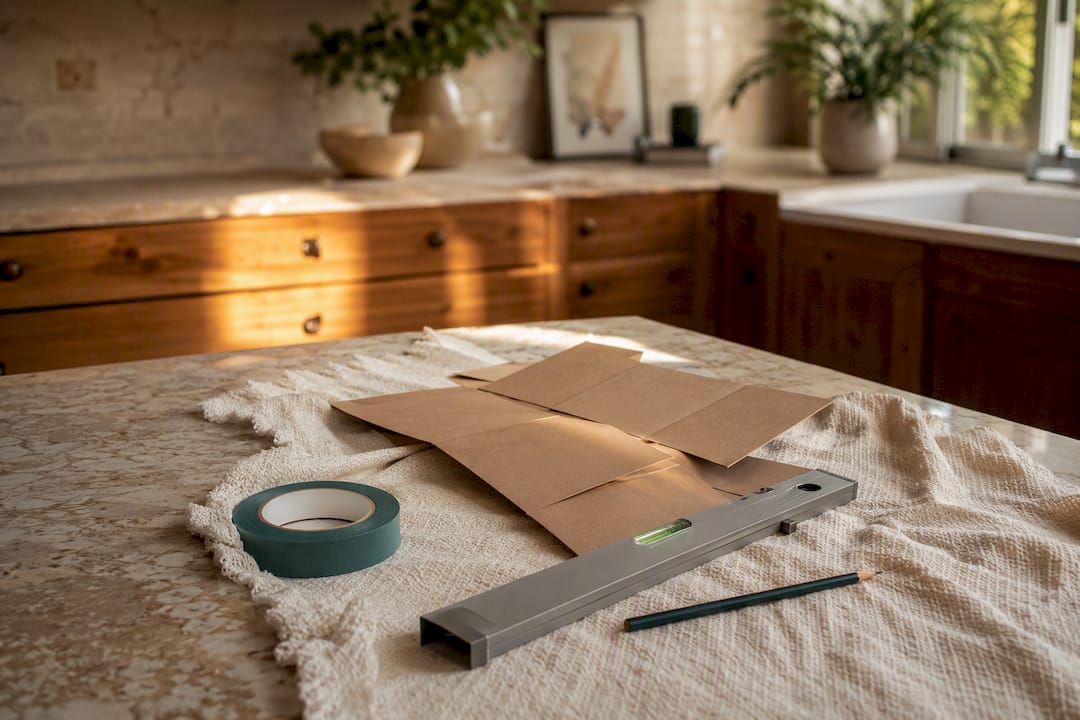
Gather everything first so you’re not mid-project searching for a stud finder. You’ll need a tape measure, a level, a pencil, painter’s tape, kraft or butcher paper for templates, a hammer, nails or picture hooks, and a pack of Command strips for lighter pieces. Helpful extras include a laser level, frame spacers, a stud finder, and foam board for building your own paper cutouts to scale.
Pro Tip: Match hardware to your wall. Drywall needs anchors for anything heavier than a few pounds, plaster holds nails fine but cracks easily if you miss, and brick requires masonry screws, not a hammer and hope.
How Do You Measure and Plan a Photo Wall Layout?
Start by measuring the blank wall’s width and height, then decide how wide your arrangement should be using expert home organization systems to optimize your wall space. If it’s going above a sofa, console, or headboard, a good rule of thumb is making the composition about two thirds the width of the furniture below it, with the bottom edge sitting roughly 15 to 25 centimeters above the furniture top so the whole thing reads as one unit.
- Measure wall width and height, and note any outlets, switches, or trim to avoid.
- Mark your intended composition width and center point directly on the wall with light pencil or tape.
- Cut paper to match each frame’s exact dimensions and tape the templates up to preview the layout.
Once the templates are up, step back to standing distance and take a photo. Viewing the arrangement from standing distance rather than straight on catches balance issues that are nearly invisible up close. This same 1:1 template method also lets you mark exact nail positions right through the paper before a single hole goes in the wall.
Pro Tip: Lay every frame on the floor first in your planned arrangement. It’s far easier to slide a frame six inches on carpet than to patch and repaint a wrong hole.
Which Layout Style Fits Your Space Best?
Four layouts cover almost every situation, and each comes with its own spacing logic. An even grid uses identical frame sizes and constant gaps for a clean, orderly feel. A salon or cluster style mixes frame sizes and shapes with more forgiving, organic spacing. A horizontal line or shelf arrangement sits low and wide, ideal above a sofa or headboard. A centered focal composition puts one statement piece in the middle with smaller pieces balanced around it.
| Layout Style | Best For | Spacing Approach |
|---|---|---|
| Even grid | Modern rooms, uniform frame sets | Constant gap, usually 5–8 cm throughout |
| Salon/cluster | Eclectic collections, mixed sizes | Flexible, roughly 4–9 cm, varies by eye |
| Horizontal line | Above sofas, consoles, headboards | Consistent baseline, calm rhythm |
| Centered focal | Statement art, small collections | Wider gaps around one dominant piece |
Each layout carries its own trade-offs: a grid is the easiest to plan but least forgiving of mistakes, while a cluster has more personality but takes longer to get right. A few practical notes worth keeping in your back pocket:
- Grids demand identical frame sizes; even a half-inch mismatch throws off the whole line.
- Clusters can absorb odd-sized pieces, including a round mirror or a small textile hanging, for visual relief against too many rectangles.
- Shelf layouts work well for renters since frames lean instead of hang, and you can rearrange them in minutes.
How Do You Hang a Photo Wall Step by Step?
With your paper templates taped up and photographed, the hanging itself moves fast if you follow a set order.
- Confirm your templates are level and centered, then mark exact nail or strip points through the paper.
- Remove the paper and install hardware, starting with your largest or anchor piece.
- Hang the anchor first, check it with a level, then build outward symmetrically in both directions.
- Step back every two or three frames to recheck spacing and alignment before continuing.
For hardware, match the tool to the frame’s weight. Command strips work well for many lightweight frames and let you reposition or remove pieces without patching the wall, which matters if you rent or simply like to change things up. Heavier frames need a proper picture hook rated for the weight, and anything over a few pounds on drywall should go into a stud or use a rated anchor.
Keep that spacing number close by as you go: aim for 5 to 8 centimeters between frames, tightening slightly for a grid and loosening a touch for an organic cluster. If a frame ends up crooked once hung, a small adhesive bumper on one back corner usually fixes the tilt without rehanging anything.
Styling Tips That Make a Photo Wall Look Curated
Cohesion comes from restraint, not matching everything perfectly. Limit your frame choices to two main styles plus one accent, such as two black metal frames and one warm wood accent, so the eye has a pattern to follow instead of a jumble to sort through.
The odd-number rule applies here too: five, seven, or nine pieces tend to balance more naturally than an even count, which can look accidentally split down the middle. Place your anchor piece first, then distribute visual weight, darker or larger images, on opposite sides rather than clustering them together.
- Choose a color story for your images (all black and white, or a shared warm tone) to unify mismatched frame sizes.
- Try washi tape, clipboards, or magnetic strips instead of frames for a lighter, more casual arrangement.
- Keep direct sunlight off framed photos and prints; UV exposure fades ink and paper over years, so an interior wall or one with sheer curtains holds color longer.
Pro Tip: Adding one round or oval piece into an otherwise rectangular grid breaks up the monotony without disrupting your spacing rules.
If you want ideas on pairing tones and materials across a room, Eman’s Gallery walks through styling wall prints with intention for readers building out a full room, not just one wall.
Quick DIY Photo Wall Projects to Try
Not every photo wall needs two weekends of planning. Here are three projects sorted by effort:
- Clipboard wall (easy, under an hour): Mount clipboards directly to the wall with screws or strips, then clip in prints you can swap whenever you like.
- Same-size print grid (moderate, one afternoon): Order identical frames, print photos to match, and hang in a tight, even grid with constant spacing.
- Photo tile mosaic (moderate to advanced, a weekend): Split one large photo into a grid of tiles, print each section at roughly 300 DPI for crisp detail, mount on foam board, and trim to uniform squares.
Renters should stick to strips or leaning shelf ledges instead of nails wherever possible, since both come down cleanly at move-out.
Common Photo Wall Mistakes and How to Fix Them
A few errors show up again and again, and most have a fast fix that doesn’t mean starting over.
- Spacing too wide: Frames start looking like separate floating islands instead of one composition; pull them closer to the 5 to 8 cm range.
- Hanging too high: The wall feels disconnected from furniture below; lower the whole arrangement rather than just the bottom row.
- Ignoring scale: A tiny cluster on a huge wall reads as an afterthought; add a small secondary grouping nearby to fill the space.
- Mixing too many frame styles: More than three finishes creates visual noise; standardize on two main colors and one accent.
For upkeep, dust frames with a dry microfiber cloth and avoid glass cleaner directly on the glass near wood frames, since overspray can seep into joints. Rotate a few prints every season to keep the wall feeling current without redoing the whole layout.
An Artist’s Take on Living With a Photo Wall
Arranging art in a home is never just decoration. Working with original paintings and prints daily, I’ve seen how the right placement turns a wall into an emotional anchor for a room, not just a display.
Give Your Photo Wall a Head Start With an Anchor Piece
Building a full gallery wall from scratch takes patience, measuring, and a fair number of nail holes. If you’d rather skip the guesswork of sourcing frames and prints piece by piece, starting with one strong anchor artwork solves half the layout problem before you even pick up a hammer.

An original painting or a museum-quality canvas print gives your composition immediate weight and a built-in color story to design the rest of the wall around. Eman’s Gallery offers pieces like the Good Tidings original and the Private Eye canvas print, both sized and finished to work as a centered focal point or the largest piece in a salon-style cluster. Browse the current signature art merchandise collection to find a piece that fits your palette, then plan your smaller frames around it.
Sources
- How to style a gallery wall with mixed frames (Pattern & Supply)
- How To Actually Make A Gallery Wall: Our No-Fail Formula We Use Every Time (Emily Henderson)
- Step by Step Guide for Planning and Hanging a Collage Wall (QuillDecor)
- Command Brand (3M)
FAQ
How Do I Make a Simple Photo Wall?
Pick one anchor piece, measure your wall to set a composition width, template the layout on paper first, then hang starting from the anchor and working outward with consistent spacing.
Is It Cheaper to Make Your Own Picture Frames?
Building frames yourself can save money on standard sizes, but for odd dimensions or a polished finish, ready-made frames or a mounted canvas print often cost less time and frustration overall.
What Mistakes Should I Avoid When Creating a Gallery Wall?
The biggest ones are spacing frames too far apart, hanging the whole arrangement too high, ignoring the scale of furniture below, and mixing more than two or three frame styles at once.
What Frame Style Works Best for a Photo Wall?
There’s no single right answer, but limiting yourself to two main frame finishes plus one accent color keeps a mixed collection looking intentional rather than cluttered.
Do I Need to Hang Everything at Once?
No. Many photo walls grow over time; start with your anchor piece and two or three supporting frames, then add more once you’ve lived with the initial layout.
Stay Connected
- ✨ Explore Eman Khalifa's original art, fine art prints and art-inspired merchandise.
- Follow Eman Khalifa's art journey on: Instagram @emans_gallery and Facebook
- Watch Eman Khalifa creating live art on: YouTube @emans_gallery
